How to make a 3D mockup in Illustrator fast? From cans to shirts, bags & trucks—wrap designs, adjust layers & blend modes in just clicks.
We’ll explain everything step by step. Screenshots will help you follow along. It’s simple and easy to learn. We’ll also share a free Illustrator alternative for 3D mockups.
Table of Contents
Why Use Illustrator for 3d Mockups?
Illustrator has top tools to design 3D mockups. That’s why designers like it. It offers tools such as:
- Mesh tool
- Clipping Masks
- Perspective Grid
- Symbols
- Shape Builder
- Curvature. And there’s more.
How to Make a 3D Mockup in Illustrator – Step-by-step
Mockups in Illustrator are now easy. It’s fast and easy. Instantly provide 3D mockups to clients. Now the big question—can this replace Photoshop in your workflow?
Let’s take a look. Pick a 3d mockup template you can try. You’ll find plenty of templates in 3dmockup.co. If you use Adobe Dimension, which comes with Creative Cloud, you can even render your own 3D models. Then bring them into Illustrator.
1. Start with a Pop Can
Pick a cylinder shape. Place your vector design over it.
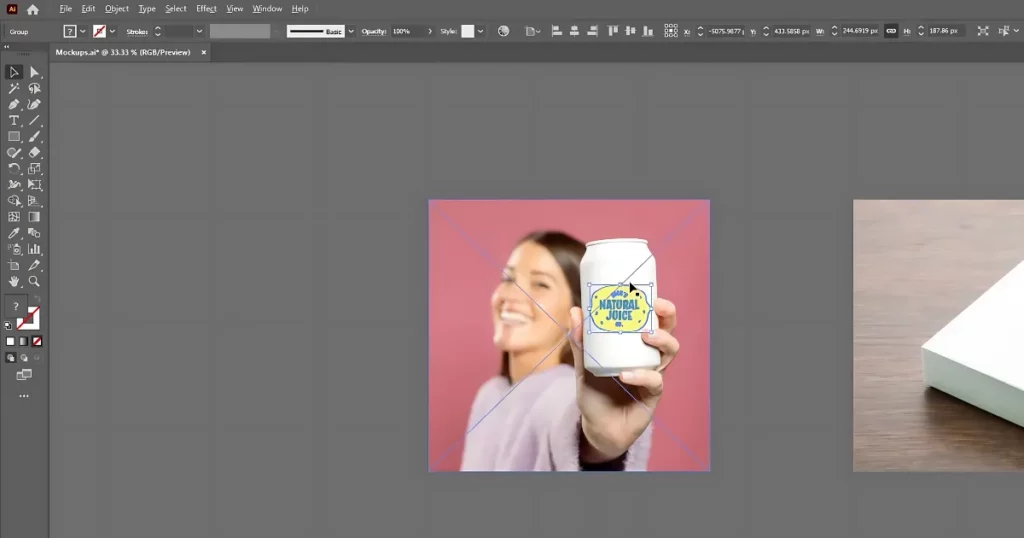
Pick both the design and the can image. Go to Object > Mockup > Make.

The design wraps nicely around the can. It even hides behind fingers if they’re in the image. You can rotate your design or scale it. Hold Shift to keep it in proportion.
Edit Elements Inside the Mockup
At the top, you can pick different parts. Choose the full group, the background, or just your graphic. This helps you adjust parts separately.
2. Try the Box Mockup
Place your design over a box. Once more, select Object > Mockup and press Make. Now open the Opacity Panel. Change the opacity or choose a blending mode like Multiply.
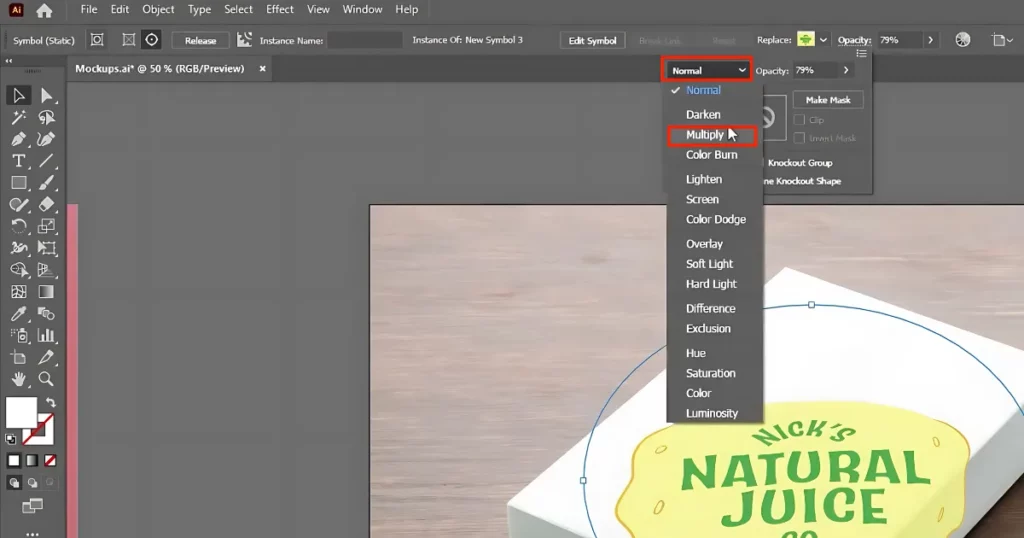
The result looks much more real. You can see shadows and depth.
Use Multiply Mode for Better Effects
Using Multiply on the can mockup improves it. It adds depth and makes the design blend with the shape. The same trick works for other objects, too.
3. Work with the Bag Mockup
Add your design to the bag. Notice how it goes behind a plant in the image. That’s hard to do in Photoshop. Here, it happens in seconds. Use Multiply again. Then scale the design up.
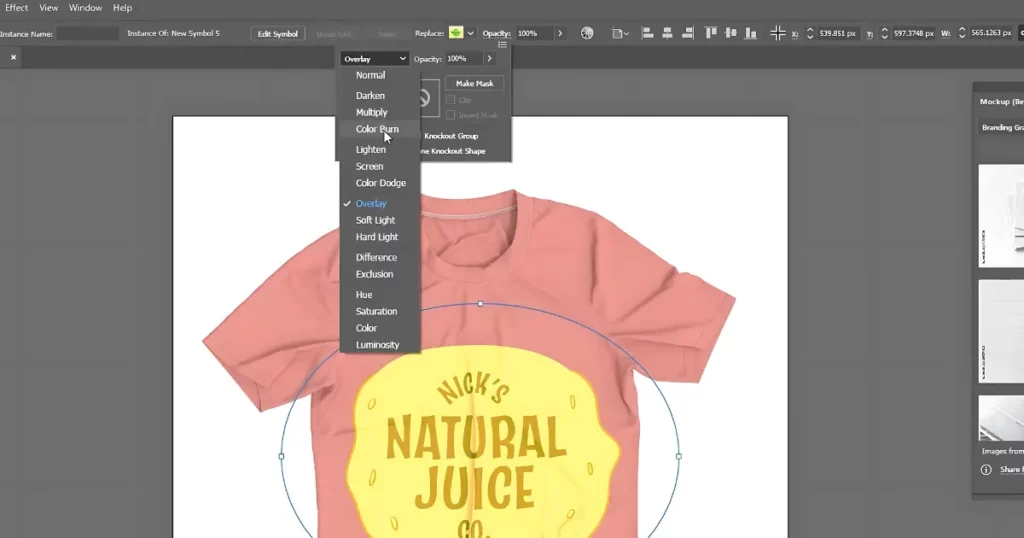
4. Tweak the Shirt Mockup
Same steps here. Apply the design. Try different blending modes. Choose what looks best. One mode keeps the shirt’s wrinkles visible but removes some colors. To fix that, duplicate the layer. Use different modes to get a more realistic look.
5. Test It on a Truck Mockup
Add your art to a truck. It may not work for full designs. But for smaller parts like a door logo, this method is quick and works well. It maintains the design’s proper angle.
That’s it. We took the idea on how to make a 3d mockup in Illustrator from Mind Island Design.
How to Make a 3D Mockup Without Illustrator?
3dmockup.co is not only the best 3d mockup generator but also gives you a free plan and extensive features to personalize. To create a 3D mockup, use these steps:
Access the Mockups
To view every 3D template that is available, click “Mockups.” No account is needed to explore.
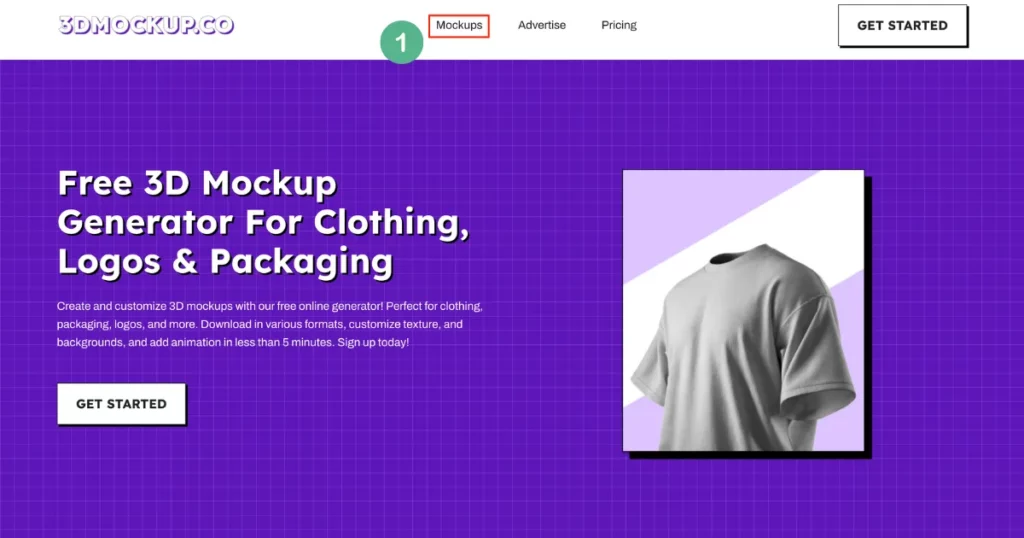
You can also begin by clicking the “Get Started.” On the left, you will see categories like Print, Apparel, Packaging, and more.
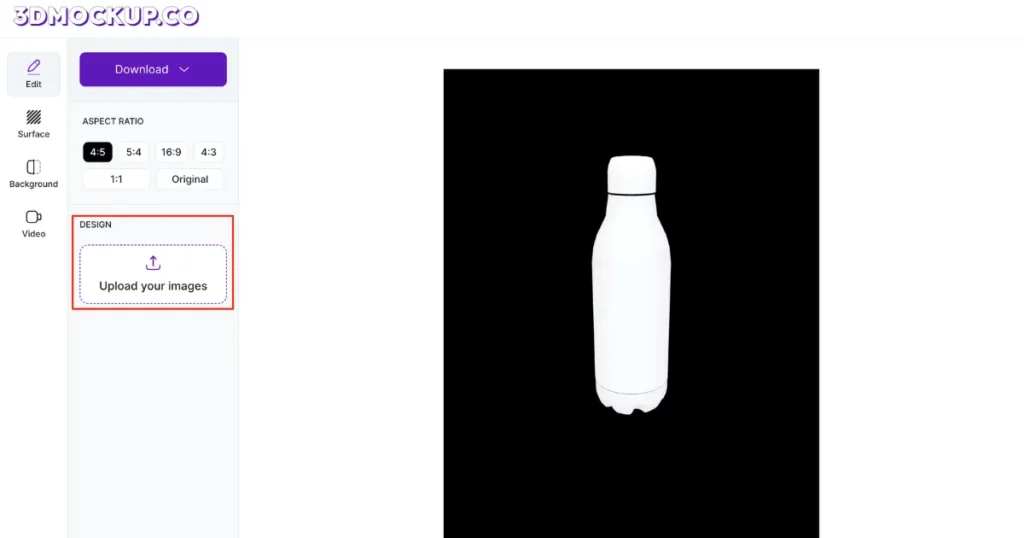
Choose a Template
Select any template that catches your eye. We chose a 3d bottle mockup template to edit.

Adjust the Aspect Ratio
Use 16:9, 4:3, or another ratio. Maintaining the actual aspect ratio is advised.
Upload Your Designs
In the “Design” section, upload your images. Adjust their position within the template to fit perfectly.
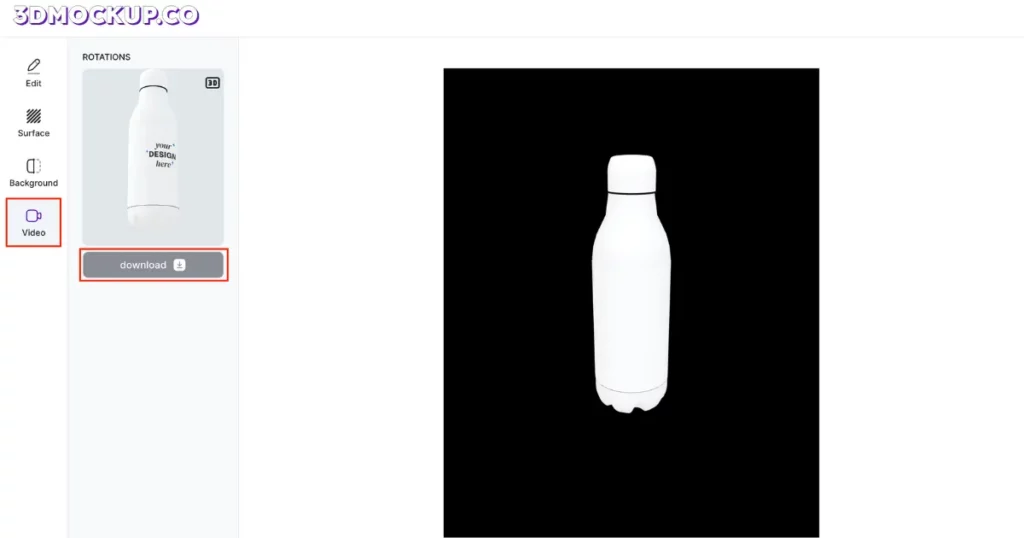
Customize the Bottle Color
You can change the bottle’s body color where your design is placed. Click on “Surface” to modify the color of the cap or other parts of the bottle.
Add Backgrounds
Enhance the 3D template with backgrounds. Choose from solid colors, gradients, or pre-made backgrounds.
Create a Video
For video visuals, click “Video” to create a 5-second rotating video of your design.
Download Your 3D Mockup
Click “Download” to save your work. Choose from PNG or JPEG formats, up to 2000 * 2500 pixels.
Illustrator’s Limitations When Creating 3D Mockups?
Do you know the limitations that Illustrator has when it comes to creating 3D mockups?
- Some elements, such as gradient mesh, placed art, and many more, cannot be used while editing the mockup. If you try to use them, the option “Preview Mockup” is greyed out. A warning notification will also appear. It will inform you that using these elements may cause an impression mismatch.
- Vector art with clip patterns is not supported.
- Quality issues.
- You can’t use vector effects.
- Multiple photos cannot be used.
Why Is 3dmockup.co the Best Choice?
For your 3D mockups, why use 3dmockup.co?
| 3dmockup.co | Illustrator |
| High-quality pre-made templates | ❌ |
| 100% free | ❌ |
| Built-in video output | ❌ |
| Ready-made background library | ❌ |
Conclusion
You understand how to make 3d mockup in Illustrator. Adobe Illustrator is not free. Design crafts are also needed. That’s where 3dmockup.co makes life easy. It offers free 3D templates. You can personalize them without any design knowledge. Select a template, make the required modifications, and that’s it. Visit 3dmockup.co now.
FAQs
How to generate 3D mockups with free images using Adobe Illustrator?
To generate 3d mockups using Illustrator:
1. In Window, select Mockup. After that, the panel will be open.
2. Use the Selection tool. After finding vector art, tap Preview Mockup.
3. Choose a template category from the dropdown.
4. Drag a template to the canvas. Place your art where you want. It fits automatically.
5. Click outside to fix it. To move it, select Edit Content.
Can I save my 3d mockups as a template in Illustrator?
You can save your 3d mockup in Illustrator. To do that, select your mockup. Then hit the + button in the panel. Find it under Your Mockups. It keeps a placeholder. Use it anytime.
How do I edit my 3d mockups in Illustrator?
To edit the 3d mockups in Illustrator, go to the Properties panel. Choose Edit Mockup Group or Edit Image.